Beginner’s Step-by-Step Guide: Paint a Watercolor Mountain Landscape
Introduction
Ready to start your artistic journey? Painting a beginner watercolor mountain landscape is the perfect way to explore the magic of watercolors while building fundamental skills. This comprehensive tutorial breaks down the process into simple, achievable steps so anyone can create impressive results, even if you’ve never picked up a brush before.
By the end, you’ll be able to showcase your own mountain scene with confidence!
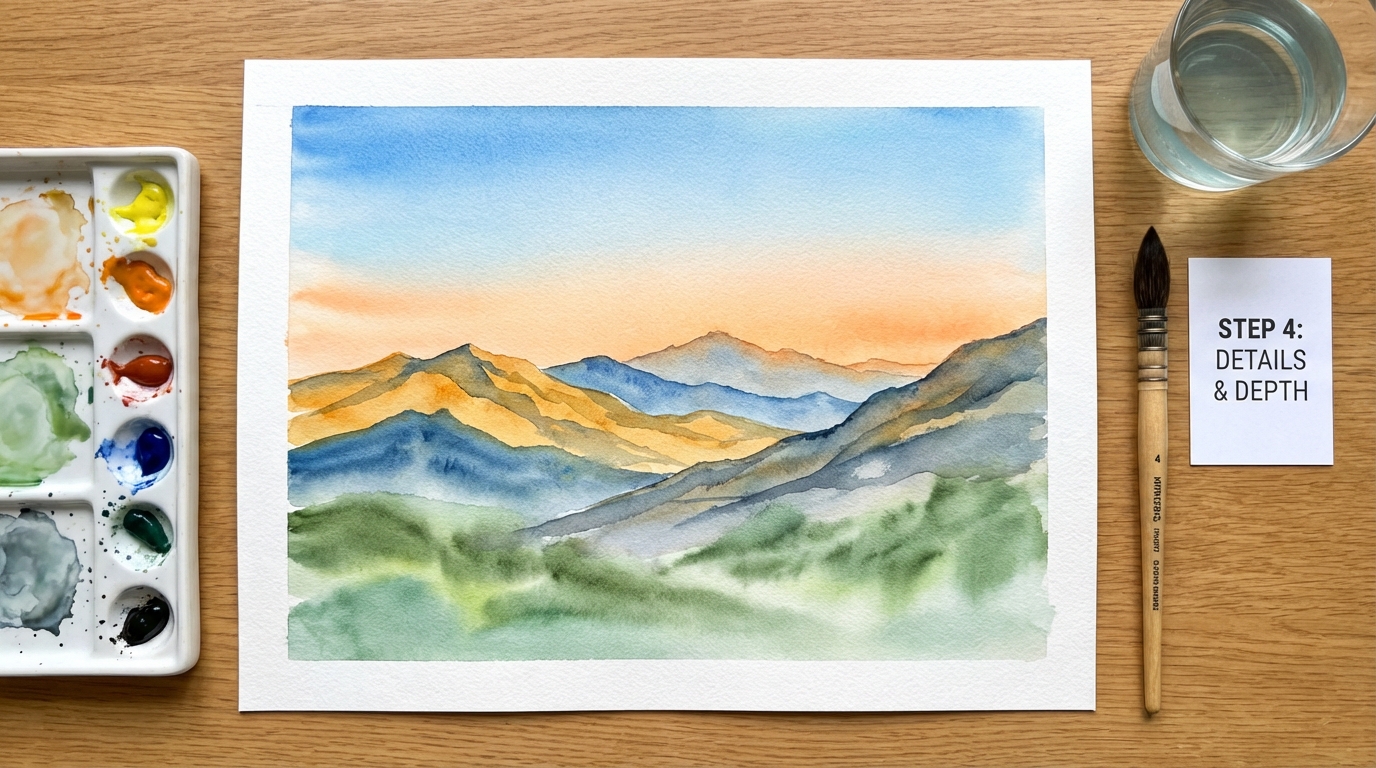
Materials Needed
- Watercolor paper (cold-pressed, 300gsm recommended)
- Watercolor paints (student/professional grade) brustro
- Brushes: round (sizes 4–10), detail brush, flat brush
- Two water jars (clean/dirty)
- Palette for mixing colors
- Masking tape (optional)
- Pencil & eraser
- Cloth or paper towels

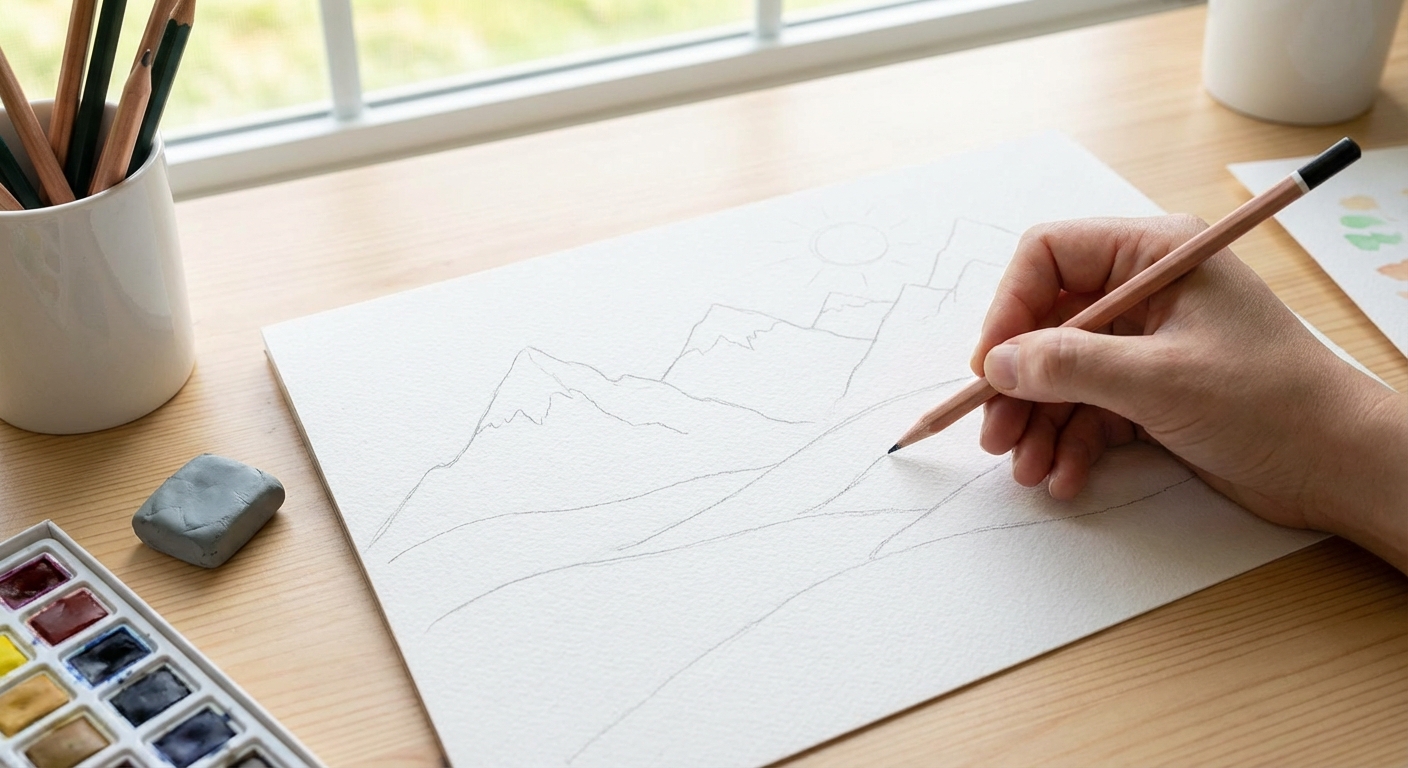
Sketching the Basic Landscape
Start with a light pencil sketch. Outline the mountain peaks, some gentle slopes, and suggest a foreground hill or tree line. Keep details minimal—let watercolor do the heavy lifting later.
Mixing Colors
Choose a simple color palette: blues for the sky, purples/blues for distant mountains, greens and browns for closer areas. Mix on your palette before applying. Test on a scrap to preview results. Custom blends add realism—don’t just use paint straight from the tube!

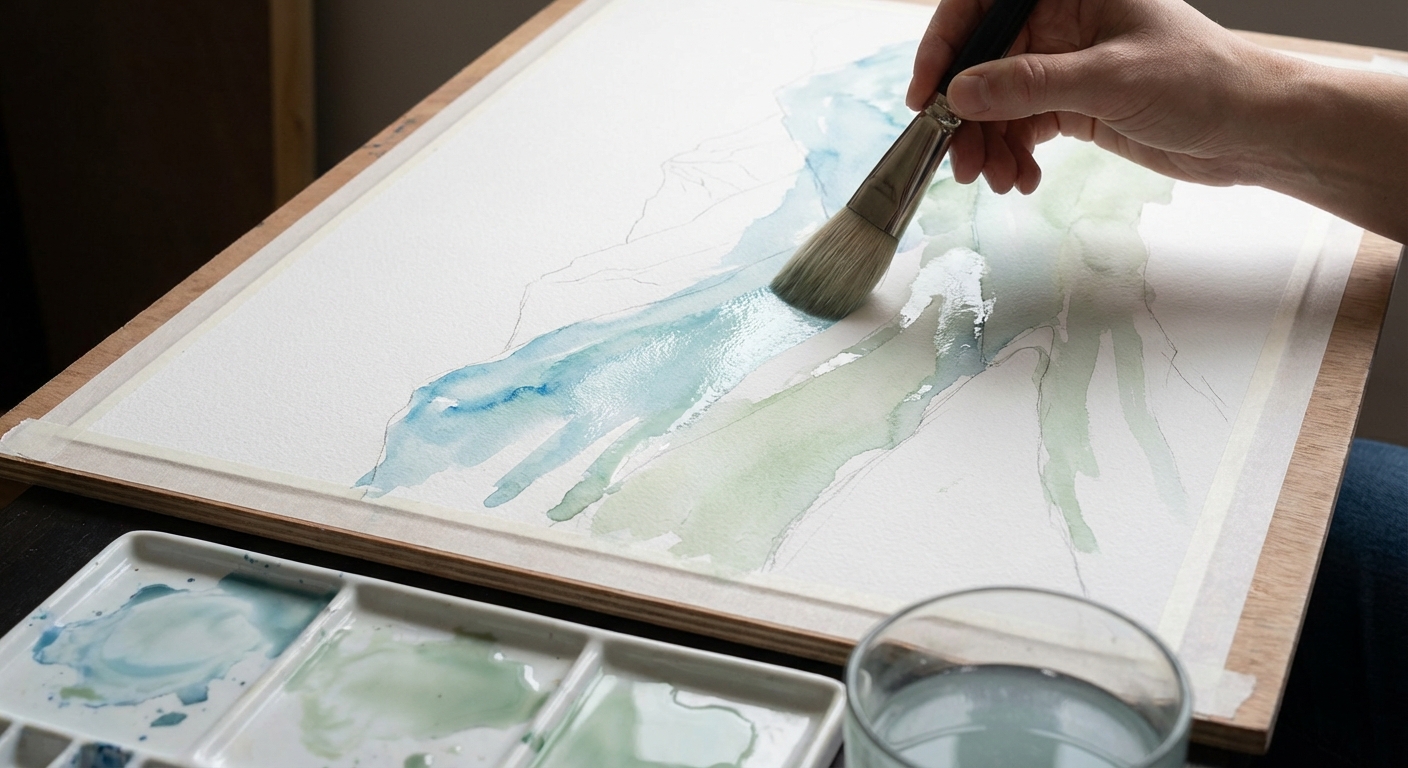
Applying the First Washes
Tape down your paper for crisp borders if desired. Wet the sky area and drop in diluted blue. Let colors blend slightly where the sky meets mountains, but keep it light and loose. Paint lighter washes for distant mountain shapes. Allow each major area to dry before moving to the next layer.
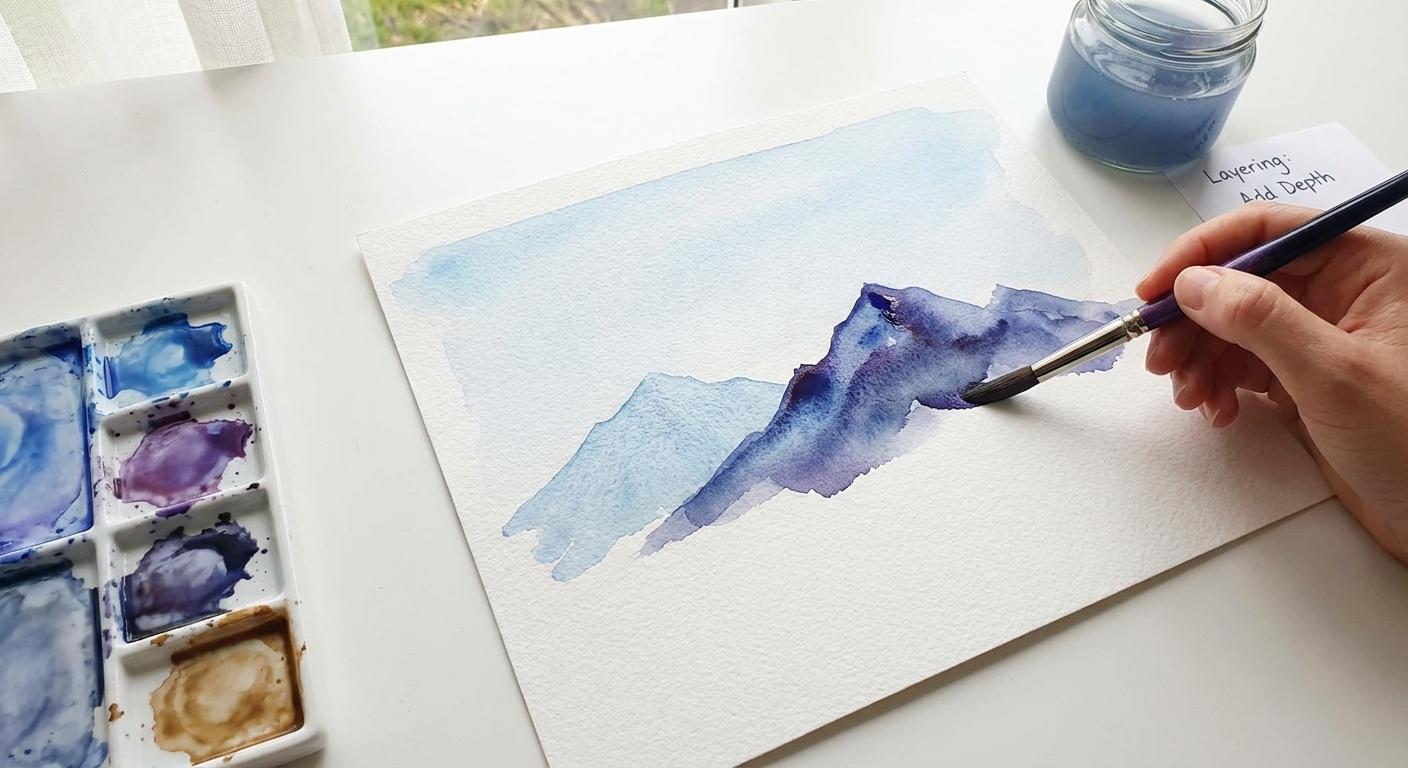
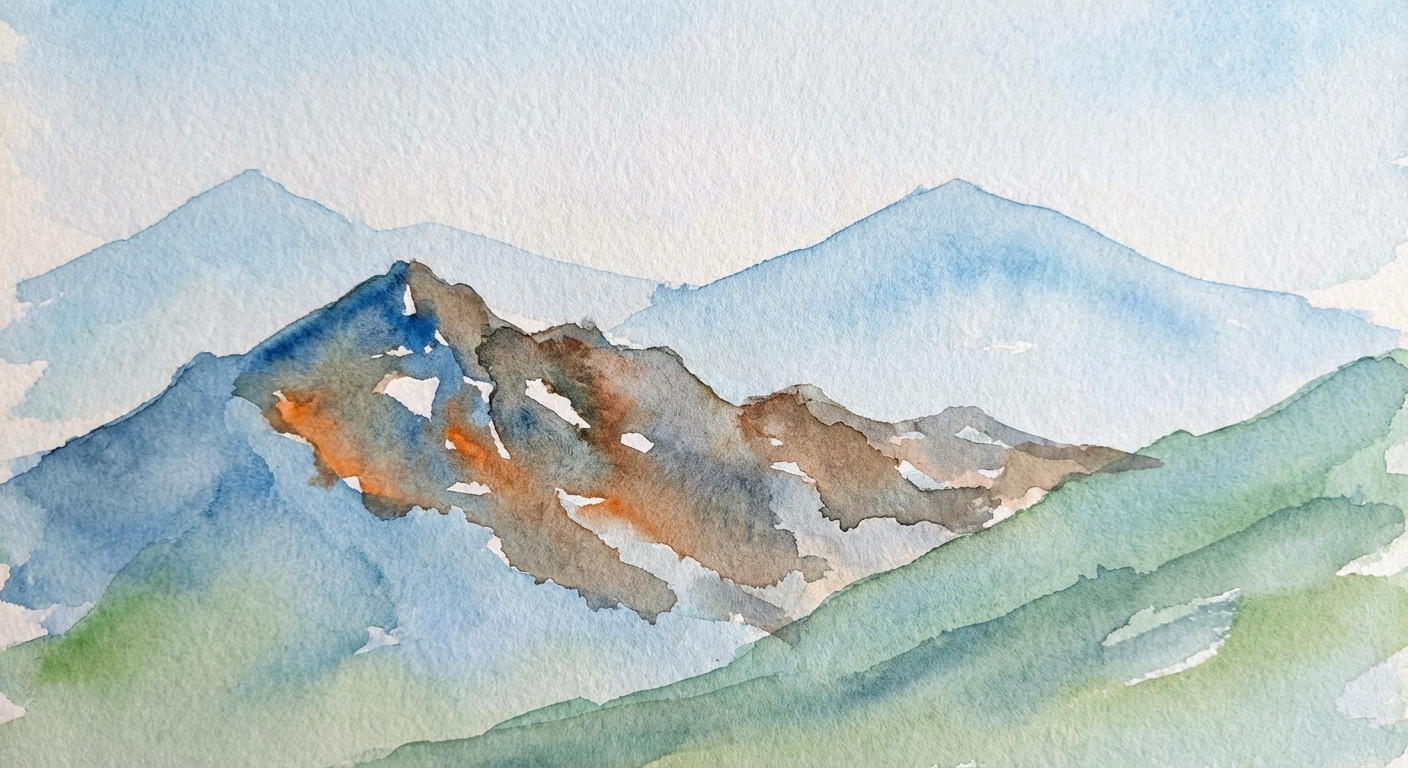
Layering & Adding Depth
Once layers are dry, use more saturated colors for midground and foreground. Paint overlapping mountain ridges: deeper blues/purples for middle distance, and greens, browns, or grays up close. Let previous layers peek through for a sense of atmosphere and space.
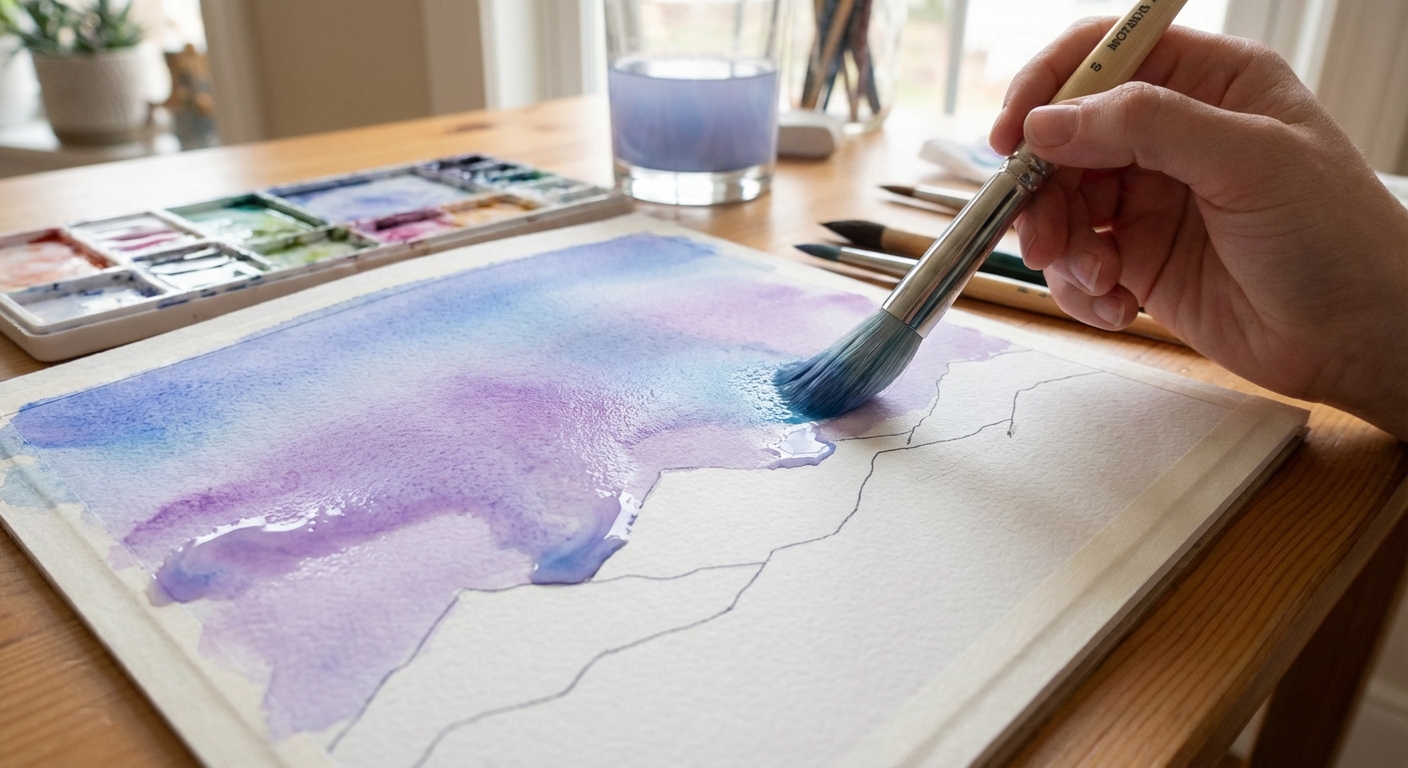
Blending & Creating Gradients
One of watercolor’s greatest strengths is its ability to blend colors seamlessly. To create those soft, glowing mountain skies and natural gradients, use the wet-on-wet technique (apply wet paint onto wet paper for smooth blending). For sharp edges, wait until the layer is fully dry before adding details on top.
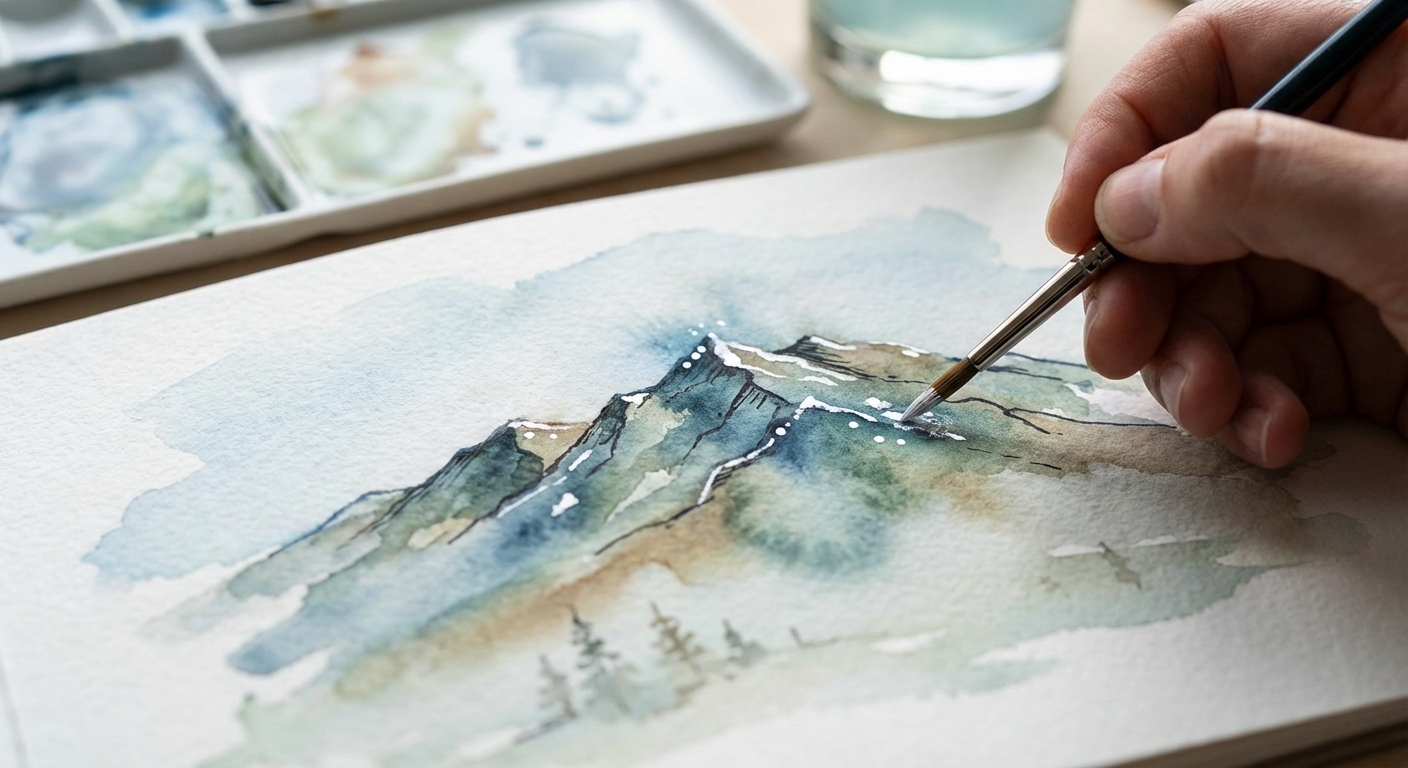
Adding Details & Final Touches
With a fine brush, paint tiny evergreen trees, hints of rocky outcrops, and distant snow caps. Use darker value paint for foreground features and lighter or faded colors for farther details. Lift out highlights by blotting damp paint with a clean brush or tissue for realistic sunlit sparkle.
Troubleshooting Common Mistakes
- Muddy Colors: Avoid over-mixing and too many paint layers while wet.
- Hard Unblended Lines: Work wet-into-wet for soft edges; only add fine lines when the base is dry.
- Water Blooms: Control the amount of water on your brush to prevent “blooms” or backruns.
Showcasing the Finished Painting
Let your finished landscape dry fully before carefully removing masking tape. Consider simple white or black frames for a modern presentation. Photograph your work in natural light for sharing online, or give as a handmade gift to family or friends. Every completed painting is the start of a new creative chapter!
Required Materials for Mountain Landscapes
To capture the majesty of mountain ranges, you need tools that allow for both expansive washes and fine, rugged textures. While a basic set of watercolors will get you started, these specific items will make a significant difference in your final piece:
- Specific Pigments: For the sky and distant peaks, Ultramarine Blue and Cobalt Blue are essentials. Payne’s Grey or a mix of Alizarin Crimson and French Ultramarine creates beautiful, moody shadows for rocky crags. For the foreground, keep Sap Green and Burnt Sienna on hand to add warmth and life.
- High-Quality Paper: Mountain landscapes involve a lot of layering (glazing). I highly recommend 100% cotton, 300gsm cold-pressed paper. It can handle multiple washes without warping or pilling, which is crucial when you’re building up those deep shadows.
- Specialty Brushes: A large flat brush (1/2 inch to 1 inch) is perfect for smooth, graded sky washes. A medium round brush (size 6 or 8) is your workhorse for mountain shapes, while a rigger or liner brush is vital for painting those thin, skeletal tree branches in the foreground.
- Masking Fluid: If you want to keep the very tips of your mountains brilliant white (representing snow), masking fluid is a lifesaver. Apply it to the peaks before you start your sky wash, and rub it off once everything is bone dry.
Pro Tips for Depth and Perspective
Creating a sense of vast distance on a flat piece of paper is the ultimate goal in landscape painting. Here are some professional techniques to help you master depth:
1. Master Atmospheric Perspective: As objects get farther away, they appear lighter, cooler (more blue), and less detailed. Your farthest mountain ridge should be a very pale, watery blue. As you move toward the foreground, each ridge should become slightly darker, warmer, and more defined. This “zoning” of values is the secret to a professional-looking scene.
2. Vary Your Edges: Use soft edges for distant mountains to suggest mist and atmosphere. You can achieve this by painting onto damp paper. For the foreground, use hard edges (painting on dry paper) to bring the viewer’s eye forward and emphasize detail.
3. Use a Sense of Scale: Mountains are massive, but they can look like small hills if there is no reference point. Adding a tiny silhouette of a bird, a small pine tree, or a distant cabin gives the viewer a scale to compare against, instantly making your mountains feel towering and grand.
Next Steps & Learning More
Want to level up your art skills? Check out other in-depth watercolor and art tutorials in our Tutorials section or explore About Srikanth Kamath for personalized art and tech guidance. Keep experimenting—your next masterpiece is just a paintbrush away!